If you were to reinstall Windows XP, you normally must re-activate it as well, even if your hardware is unchanged... luckily, there's a way around this.
First, your hardware between reinstalls must NOT change..
XP keeps the activation information in a file named "wpa.dbl", which can be found in
C:\WINDOWS\System32\
After your activating Windows XP, back this file up to a floppy or some other type of media.
Now, if you ever need (or want) to reinstall Windows XP, go through the whole procedure as you normally would. Once you get into Windows itself, copy the file from your media back into C:\WINDOWS\System32\...
You may need to be in safe mode to do this, however.
To Do so press F5 or F8 Key before Windows Bootup and select safe mode and after you Login copy the file..
Wednesday, October 29, 2008
Windows keyboard shortcuts overview
You can open up a list of all the keyboard shortcuts for Windows XP and print them out for an instant reference.
click on run in start menu
type in:
%windir%\Help\keyshort.chm
click OK
Quick and convenient.
Note:
This is Valid On Windows Xp,2003 And Not on Vista & Above.
click on run in start menu
type in:
%windir%\Help\keyshort.chm
click OK
Quick and convenient.
Note:
This is Valid On Windows Xp,2003 And Not on Vista & Above.
MBR Recovery
You're actually a WinXp user and installed Linux as a secondary OS just to have a look at it?
You installed the Lilo Bootloader too, and now want to get rid of both and get back to WinXp without having to reinstall the whole system or to install a secondary bootloader?
Then this is the right guide for you! It's as simple as 123, believe me.
(Important: To perform this operation it is inalienable that you're still able to start up your Windows XP operating system!
Furthermore this guides assumes that your operating system is on Harddisk 0, drive C:\)
1. Put the WinXP in your cdrom drive (Assumes to be d: if any other type that drive letter instead of d:)
2. Click start -> Run -> and type: d:\i386\winnt32.exe /cmdcons
This will download and install the "Recovery Console"
3. Right click "My Computer" -> Properties. The System properties pop up.
Click on the "Advanced" tab and then the
"Settings" button"
4. Make sure that "Time to display list of operating systems" is enabled!
5. Restart your PC and start the Recovery Console when the System prompts you.
6. When the Recovery Console prompts you to start a system, just type "1" and push enter.
7. When the Recovery Console has finished loading, type in the following lines:
fixmbr /device/harddisk0
Just ignore all the warning and type "y" for yes.
8. Restart the system
9. Once you've finished this operation you might want to disable the "Time to display..." option in the system panel.
Congrats! You've just successfully restored your Master Boot Record to it's original state!
Alternatively or if you can no longer boot to the harddisk, configure your BIOS to start from cd and boot to the Windows XP cd. At the "Welcome to Setup" screen select R. This will load the recovery console.
Disable "shortcut to" prefix without external programs
This tweak stops windows creating the annoying "shotcut to" prefix when creating shortcuts to the desktop via either dragging/dropping or right clicking and selecting send to . This means that you do not need to rename all those shortcuts on your desktop . Here's how -
Click on Run in Start Menu and Type Regedit.
Locate the following registry key:
HKEY_CURRENT_USER\Software\Microsoft\Windows\CurrentVersion\Explorer
Double Click on Link and change its value to be 00 00 00 00 by default it might be 1b 00 00 00 in Windows Vista.
Restart the computer for changes to take effect.
completely remove "index.dat"
Index.dat files are files impossible to delete under windows, and it stores all the information of your surfing history, you can be followed through these dangerous files. and even if you delete your cookies and your history, these index.dat files remain there and become bigger and bigger, their original size is 16kb but they can reach up until 600kb.
to preserve your privacy I found a way to delete them.. it's impossible to do in windows thus you have to reboot your computer then press F8 or F5 for advanced boot options; then choose
"safe mode with command prompt";
log in as administrator and then from there you can delete them freely without windows preventing it.
click on run in start menu and type cmd
just go to the root (c:\) by typing CD\
then type
del index.dat /S /A
then Hit enter
and all the files names index dat in your computer will be deleted permanently.
for more security; also in command prompt mode; go and completely delete your cookies folder to be completely sure all your internet cache and history is gone forever. (well until you start browsing again; as soon as you boot up normally windows will recreate them.. But blank)
No recent documents history
If you Donot want to View the files that you had recently opened or to protect your privacy you can use this tweak
Go to Start - click on Run...
and then type "gpedit.msc" and enter
now go to User Configuration - Administarative Templates - Start Menu and Taskbar
now double click "Do not keep history of recently opened documents" and click on "Enabled"
then click ok .
Go to Start - click on Run...
and then type "gpedit.msc" and enter
now go to User Configuration - Administarative Templates - Start Menu and Taskbar
now double click "Do not keep history of recently opened documents" and click on "Enabled"
then click ok .
Watch movies with 'AboveNormal' priority
This tweak will launch WindowsMediaPlayer with the 'AboveNormal' priority setting when opening a mediafile.
Having trouble watching a movie when you also have a lot of background processes going on?
Here's what to do:
1. Create a new textfile in the root of c:\, but instead of giving it the .txt extension you name it wmp_AboveNormal.bat
2. Right-click this file and choose 'Edit', you'll see it'll open notepad. Put this line in:
start /AboveNormal C:\"Program Files"\"Windows Media Player"\wmplayer.exe %1 %*
3. Save (make sure you save it as .bat, not as .txt) and close.
Now all you have to do is register your mediafiles to this batchfile. Here's how to do that:
4. In Windows Explorer choose Tools>Folder Options >File Types
5. Scroll down(press A) to the AVI filetype
6. Click 'Change' and point to c:\wmp_AboveNormal.bat . Click OK and Close.
Now everytime you dubbleclick an .avi WMP will open with the 'AboveNormal' -priority setting ! (Repeat steps 4-6 to register all mediatypes you want to be opened this way.)
These are all the settings: Realtime, High, AboveNormal, Normal, BelowNormal, Low.
*Realtime is not recommended unless you have a dual-CPU system!
Speed Boot - Boot 2 Seconds Faster
Creating a script to run on shutdown that deletes the temp folder and history Decreases Boot time by 2.5 seconds.
Create a batch file by doing the following:
1) Open notepad and enter the following lines:
RD /S /q "C:\Documents and Settings\"UserName without quotes"\Local Settings\History"
RD /S /q "C:\Documents and Settings\Default User\Local Settings\History"
RD /S /q "D:\Temp\" <--"Deletes temp folder, type in the location of your temp folder"
2) Save the file and then rename is something like deltemp.bat
3) Now click Start>Run and type in gpedit.msc
Go to --->Computer Configuration --->Windows Settings --->Scripts
and double click on Shutdown --->Click Add and find the batch file you created and press ok to set the script
Please Note in RD /S /q "C:\Documents and Settings\"UserName without quotes"\Local Settings\History"
"UserName without quotes" is Your Account Name, if you dont know ,just click on My computer
Under Files Stored on This Computer you will find Shared documents and Another Folder xxxxx's documents
where xxxxx is ur Account name.
Clicking AVI Files on explorer causing 100% CPU Usage
Well windows seem to have a REALLY big problem when it comes to reading AVI files.
It seems that when you click on an AVI file in explorer, it'll try to read the entire AVI file to determine the width,height, etc. of the AVI file (this is displayed in the Properties window).
Now the problem with Windows is that if you have a broken/not fully downloaded AVI file that doesnt contain this info, Windows will scan the entire AVI file trying to figure out all these properties which in the process will probably cause 100% CPU usage and heavy memory usage.
To solve this problem all you have to do is the following:
1. Click On Run in Start Menu and type regedit
2. Goto HKEY_CLASSES_ROOT\SystemFileAssociations\.avi\shellex\PropertyHandler
3. Delete the "Default" value which should be
"{87D62D94-71B3-4b9a-9489-5FE6850DC73E}"
Please not that this will no longer provide you with the windows properties displaying the AVI file information such as width, height, bitrate etc. But its a small price to pay for saving you resources.
CD ROM Stops AutoPlaying
CD ROM Stops AutoPlaying and the AutoPlay Tab has disappeared in My Computer, Devices With Removable Storage.
Solution:
The service: "Shell Hardware Detection" has been set to Manual or Disabled.
Go to Control Panel, Administrative Tools, Services.
Browse for "Shell Hardware Detection" service and set its Startup type to "Automatic" And if Service is Not Running Click Start.
Solution:
The service: "Shell Hardware Detection" has been set to Manual or Disabled.
Go to Control Panel, Administrative Tools, Services.
Browse for "Shell Hardware Detection" service and set its Startup type to "Automatic" And if Service is Not Running Click Start.
No more low disk space messages
On Start Menu click on run and type regedit
Then Browse to-->
HKEY_CURRENT_USER\Software\Microsoft\Windows\CurrentVersion\Policies\Explorer\
Find DWORD "NoLowDiskSpaceChecks"
and (if not already there) add DWORD (without quotes) "NoLowDiskSpaceChecks" and change the value to 1.
Restart Ur Pc For Changes To Take Place.
Then Browse to-->
HKEY_CURRENT_USER\Software\Microsoft\Windows\CurrentVersion\Policies\Explorer\
Find DWORD "NoLowDiskSpaceChecks"
and (if not already there) add DWORD (without quotes) "NoLowDiskSpaceChecks" and change the value to 1.
Restart Ur Pc For Changes To Take Place.
Enable Right Clicks on The Sites Dat Disable it
Lots of web sites have disabled the right click function of the mouse button...
it's really, really annoying. This is done so that you don't steal (via right-click->save picture) their photos or images or any other goodies. Unfortunately, it disables ALL right-click functionality: copy, paste, open in new window.
It's easy to change, assuming your using IE 6/7/8:
Click "Tools"->"Internet Options"
Click the "Security" tab
Click "Custom Level"
Scroll down to the "Scripting" section
Set "Active Scripting" to "disable"
Click "Ok".
You'll probably want to turn this back to "enable" when your done because generally the javascript enhances a website.
Saturday, October 18, 2008
How to Enable and Activate Administrator Account in Vista and then Unhide or Show in Welcome Screen
To activate the administrator account in Vista, follow these guide’s instructions:
Logon to Windows Vista with normal user account username and password (must belongs to Administrators group).
Click on Vista Start button, and type cmd in the Start Search box.
Right click on the Cmd returned on the search results pane above, then select
Run As Administrator
In the Command Prompt window, type the following text at the command line to set a password for administrator account. If you want to use a blank password for the Administrator account, skip this step.
net user administrator password
Replace password with the actual password string that you have chosen. Press Enter when done.Note that if your computer is a member of domain controller or has enabled complex password requirement in Local Security Policy, you will have to pick a really hard to remember password mixed with symbols.
Next type the following command and press Enter to activate and enable Administrator account:
net user administrator /active:yes
The process should completed with the following message:
The command completed successfully
If not success message is returned, repeat the process again.
Logout from Vista by choosing Log Off or Switch User.
Click on Administrator icon and logon with the password you selected
to disable Administrator account
type
net user administrator /active:no
If you’re not comfortable in using command prompt in activating administrator account in Windows Vista, there is another easy way to enable the Administrator account by using graphical user interface (GUI) within Vista desktop.
Click on Vista Start button, then go to Control Panel.
Inside Control Panel, click on System and Maintenance link, follow by Administrator Tools at the bottom.
An Administrator Tools window appears.
From there, click on Local Security Policy applet.
Alternatively, type secpol.msc in Start Search box and press Enter.
Click Continue on User Account Control’s Windows needs your permission to continue running Microsoft Management Console (MMC) dialog box
On the left pane of Local Security Policy MMC, expand Security Settings (should be opened by default), then expand Local Policies.
Click on security options baranch
Double click on Accounts: Administrator account status setting, then select Enabled radio button on Local Security Setting tab of Properties window.
Click on OK button.
Log off, switch user of restart your computer to logon with activated Administrator account.
Offload Network Task Processing onto the Network Card
Many newer network cards have the ability of taking some of the network processing load off of the processor and performing it right on the card (much like Hardware T&L on most new video cards).
This can significantly lower the CPU processes needed to maintain a network connection, freeing up that processor time for other tasks.
This does not work on all cards, and it can cause network connectivity problems on systems where the service is enabled but unsupported, so please check with your NIC manufacturer prior to enabling this tweak.
Click On RUN in start menu and type regedit
Go to->
HKEY_LOCAL_MACHINE \ SYSTEM \ CurrentControlSet \ Services \ Tcpip \ Parameters
Find the DWORD "DisableTaskOffload" and set the value to 0 (the default value is 1).
If the key is not already available, create it.
Friday, October 17, 2008
Give 16-bit apps their own separate processes
By default, Windows XP will only open one 16-bit process and cram all 16-bit apps running on the system at a given time into that process.
This simulates how MS-DOS based systems viewed systems and is necessary for some older applications that run together and share resources.
However, most 16-bit applications work perfectly well by themselves and would benefit from the added performance and stability of their own dedicated resources.
To force Windows XP to give each 16-bit application it's own resources,
in run Menu Type Regedit
browse to
HKEY_LOCAL_MACHINE\SYSTEM\CurrentControlSet\Control\WOW
and find the String "DefaultSeparateVDM".
If it is not there, you may need to create it.
Set the value of this to Yes to give each 16-bit application its own process, and No to have the 16-bit application all run in the same memory space.
Thursday, October 16, 2008
Disable User Tracking
[HKEY_CURRENT_USER \ Software \ Microsoft \ Windows \ CurrentVersion \ Policies \ Explorer]
"NoInstrumentation"=dword:00000001
The user tracking system built into Windows XP is useless to 99% of users, and it uses up precious resources to boot, so it makes sense to disable this "feature" of Windows XP. To do so,
click on run in Start menu(WinKey+R) and Type Regedit.
Now Browse to
HKEY_CURRENT_USER \ Software \ Microsoft \ Windows \ CurrentVersion \ Policies \ Explorer
and find the DWORD NoInstrumentation.
You may need to create this key if it is not there.
The default setting is 0, but setting it to 1 will disable most of the user tracking features of the system.
Wednesday, October 15, 2008
Free Idle Tasks Tweak
This tweak will free up processing time from any idle processes and allow it to be used by the foreground application.
It is useful particularly if you are running a game or other 3D application.
Right click on desktop ,click on new>shortcut
And In Location Box Type
Rundll32.exe advapi32.dll,ProcessIdleTasks
And place it on your desktop.
Double-click on it anytime you need all of your processing power, before opening the application.
I have Noticed that sometimes this above mentioned method doesn't work...
If So Just follow procedure below
1\right click on desktop, click on new>Text document
2\Now type Rundll32.exe advapi32.dll,ProcessIdleTasks
3\Now while saving the file,For Save as type:select All Files(*.*)
4\And in file name type free.bat
5\Now whenever you need to free up system resource,just click on this file on desktop
6\In case if you are using Vista, you have to right click on this file(free.bat) and click on run as administartor..
Saturday, October 11, 2008
Formatting An Hdd, when fdisk won't
CAUTION: This debug script is for advanced users only. Its Purpose is to remove all formatting and partitioning information from your hard disk when FDISK is unable to do so. THIS WILL REMOVE ALL DATA AND PROGRAMS FORM THE DRIVE.
1. Create a MSDOS bood disk with Debug
2. At DOS command prompt type the following: Debug[Enter] (Where enter is to press the enter key once)
NOTE: Type the following bolded text only. You will recieve an error if you type anything other than the bold text. The non-bolded text represents what will appear on you screen once you press [Enter] after each command.
-F 200 L1000 0 [Enter]
-A CS:100 [Enter]
xxxx:0100 MOV AX,301 [Enter]
xxxx:0103 MOV BX,200 [Enter]
xxxx:0106 MOV CX,1 [Enter]
xxxx:0109 MOV DX,80 [Enter] NOTE: ( --- "80" for hd0, "81" for hd1)
xxxx:010c INT 13 [Enter]
xxxx: 010e INT 20 [Enter]
xxxx: 0110 [Enter] -G [Enter] "Program terminated normally"
3. Turn off the computer.
On the next startup the hard drive will need to be partitioned and formatted.***
Monday, October 6, 2008
Easily Find Mp3 songs for download-Google tricks part3
Here is another trick that works fairly decent for finding mp3's on the web (which is hard to do normally, to say the least)
say you want to get, for example, a Colbie Caillat song. type this in the search bar -
"index of/" "Colbie Caillat" .mp3
the ones you want to check out first are the ones that say "Index of/" in the title of the search result. this technique allows you to easily pull up web folders with direct downloads. it will look the same as if you were logging into a ftp url.. i'm sure you can be pretty flexible on how you type that in, so long as you include "index of/"
i'm sure you can use this for more than just mp3's .
Always make sure to use the quotations where i placed them. they help pinpoint the correct search results more accurately. just try it out, also if you want to learn how to do more with google look up "google hacks"
Easily Find Serial Keys in Google-Google tricks part2
In the search bar type in just like this - "PRODUCT NAME" 94FBR
Replace the PRODUCT NAME with software for which you are finding the serial key
the key is the 94FBR code.. it was included with many MS Office registration codes so this will help you dramatically reduce the amount of 'fake' porn sites that trick you.
Or if you want to find the serial for winrar - type
"Winrar" 94FBR
just try it out, it's very quick and it works nicely..
Sunday, October 5, 2008
Google tricks part1
Google secrets
--------------------------------------------------------------------------------
method 1
Type ?ww.google.com instead of www.google.com
and put any of this string in google search:
"parent directory " /appz/ -xxx -html -htm -php -shtml -opendivx -md5 -md5sums
"parent directory " DVDRip -xxx -html -htm -php -shtml -opendivx -md5 -md5sums
"parent directory "Xvid -xxx -html -htm -php -shtml -opendivx -md5 -md5sums
"parent directory " Gamez -xxx -html -htm -php -shtml -opendivx -md5 -md5sums
"parent directory " MP3 -xxx -html -htm -php -shtml -opendivx -md5 -md5sums
"parent directory " Name of Singer or album -xxx -html -htm -php -shtml -opendivx -md5 -md5sums
Notice that i am only changing the word after the parent directory, change it to what you want and you will get a lot of stuff.
method 2
?ww.google.com
put this string in google search:
?intitle:index.of? mp3
You only need add the name of the song/artist/singer.
Example: ?intitle:index.of? mp3 colbie
Thursday, October 2, 2008
Remove Checking for compressed file while disk cleanup
On an NTFS partition, Disk Cleanup can compress old files
to save space. But calculating the savings and performing
the compression often take a long time, and on some systems,
Disk Cleanup hangs during the process. If that happens, or if
you don't care to wait, use this Registry tweak to disable the
compression:
In start menu click on run and type regedit
Go to-->
HKEY_ LOCAL_MACHINE\SOFTWARE\Microsoft\Windows\
CurrentVersion\Explorer\VolumeCaches\Compress Old Files
delete The Compress Old Files key.
I dont think this tweak works in Vista.
Wednesday, October 1, 2008
Anonymous Windows Update
Would you like to use the Windows Update feature without being forced to register with Microsoft? OK then, this is what you can do:
In start menu click on Run and type Regedit.
Go down to
HKEY_LOCAL_MACHINE\Software\Microsoft\Windows\
CurrentVersion.
Look for a value named RegDone. If it isn't there create a new value ,right click on Current Version and select new, now a box will slide open, just select
DWORD Value
Name it to RegDone, & set its value to 1
Close Regedit and
Enjoy!
Subscribe to:
Posts (Atom)
-
Scanned and Confirmed to Be Virus Free Click Here to Download
-
This video tutorial demonstrates how to easily setup your Raspberry Pi as Android TV A big shout out to KonstaKang for providing a modified ...
-
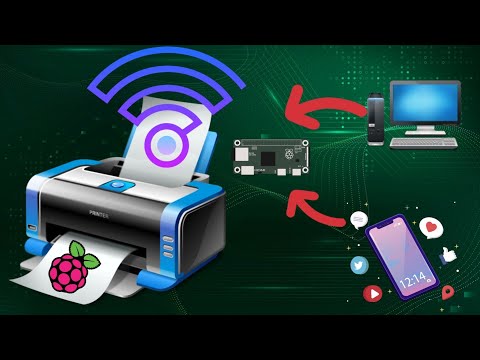
This video tutorial demonstrates how to easily add wireless print capablity to your wired legacy printers using your Raspberry Pi. We hav...


How to add Wireless capability to legacy printers using Raspberry Pi
This video tutorial demonstrates how to easily add wireless print capablity to your wired legacy printers using your Raspberry Pi. We hav...