In video we are going to learn how to setup VMware EXSi Hypervisor on your Raspberry Pi 4 You can download EXSi from link below https://customerconnect.vmware.com/downloads/get-download?downloadGroup=ESXI-ARM Please clone the repository below for Raspberry Firmware https://github.com/raspberrypi/firmware Download latest UEFI firmware zip from link below https://github.com/pftf/RPi4/releases
Saturday, April 30, 2022
How to setup VMware ESXi Hypervisor on Raspberry Pi
In video we are going to learn how to setup VMware EXSi Hypervisor on your Raspberry Pi 4 You can download EXSi from link below https://customerconnect.vmware.com/downloads/get-download?downloadGroup=ESXI-ARM Please clone the repository below for Raspberry Firmware https://github.com/raspberrypi/firmware Download latest UEFI firmware zip from link below https://github.com/pftf/RPi4/releases

Saturday, April 23, 2022
How to Program STM8S103F With Arduino IDE
This video demonstrates how to program/develop firmware for STM8S103F with Arduino IDE
Setting up the Arduino IDE
Step 1: Download Arduino IDE below based on your operating system and install it.
https://www.arduino.cc/en/software/
Step 2: Tap File , Preferences to open the preferences window and paste the link given below into the additional boards manage URL text box and tap OK.
https://github.com/tenbaht/sduino/raw/master/package_sduino_stm8_index.json
For details about STM8S103 (blue) visit link below
https://tenbaht.github.io/sduino/hardware/stm8blue/
You will need Stlink drivers to program the board via ST Link
https://www.st.com/en/development-tools/stsw-link009.html#st-get-software
Datasheet of STM8S https://www.st.com/resource/en/datasheet/stm8s103f2.pdf
Monday, April 4, 2022
How to interface SPI TFT LCD(ST7735) with RaspberryPi- Part 2
http://usheethe.com/3M6v
To add console output to the LCD run the commands below sudo nano /boot/cmdline.txt
At the end of the line enter below text:
fbcon=map:10 fbcon=font:VGA8x8
Then save the file.
To stream a rtsp stream to lcd, execute the command below
ffmpeg -i rtsp://wowzaec2demo.streamlock.net/vod/mp4:BigBuckBunny_115k.mp4 -vf scale=200:-1 -pix_fmt rgb565 -f fbdev /dev/fb1
Execute the command below and you will have the desktop on the lcd
FRAMEBUFFER=/dev/fb1 startx
This video was created upon request from one of the subscribers.
Music: Verve
Musician: A-GROUP
Friday, March 18, 2022
How to interface CAN peripheral to Raspberry Pi
This video demonstrates how to interface a CAN board to RaspberryPi Buy the waveshare CAN hat at http://barsoocm.com/2HQY Run below command sudo raspi-config now navigate to Interface Options → SPI and select Yes to enable the SPI interface. Edit the config file sudo nano /boot/config.txt Add this line to the file: dtoverlay=mcp2515-can0,oscillator=12000000,interrupt=25,spimaxfrequency=2000000 Now reboot your Pi and after bootup run below command to check setup CAN interface sudo /sbin/ip link set can0 up type can bitrate 500000 Verify the interface is up with below command ip addr | grep "can" Install CAN utilities with below command sudo apt install can-utils To receive data from other nodes run below command candump -tz can0 To send a sample data cansend can0 7FF#0102030405060708 This will send a CAN 11-bit ID of 7FF. Data 01 02 03 04 05 06 07 08
Monday, January 31, 2022
How to interface SPI TFT LCD(ST7735) with RaspberryPi - Part 1
This video demonstrates how to interface SPI TFT LCD(ST7735) with RaspberryPi
We are using GPIO python libraries to toggle gpio's and interface with SPI.
Download the source code from link below http://fumacrom.com/3d4Nd Note: This tutorial was tested on 32bit Raspberry Pi OS and may not work on 64 bit version.
Saturday, January 8, 2022
How to Install Windows Applications on Linux
This video demonstrates how to configure your Ubuntu OS to install and run windows applications.open terminal and run below command sudo apt install -y playonlinux
Saturday, December 25, 2021
How to Toggle RaspberryPi GPIO/LED from Web
This video demonstrates how to Toggle RaspberryPi GPIO from Web Browser. We use WebIOPi library to achieve this. steps by step to install WebIOPi Usage wget https://github.com/Freenove/WebIOPi/archive/master.zip -O WebIOPi.zip unzip WebIOPi.zip cd WebIOPi-master/WebIOPi-0.7.1 patch -p1 -i webiopi-pi2bplus.patch sudo ./setup.sh Start WebIOPi sudo webiopi -d -c /etc/webiopi/config For more details visit http://webiopi.trouch.com/ Tutorials on digital pin control http://webiopi.trouch.com/DIGITAL.html Tutorials on Analog interface http://webiopi.trouch.com/ANALOG.html Tutorials on interfacing sensors http://webiopi.trouch.com/SENSOR.html visit below for more https://WorldoMo.blogspot.com
Subscribe to:
Posts (Atom)
-
Scanned and Confirmed to Be Virus Free Click Here to Download
-
This video tutorial demonstrates how to easily setup your Raspberry Pi as Android TV A big shout out to KonstaKang for providing a modified ...
-
Link not working...? Here's some tips and trick on the net: *If you dont long-press the menu key - another way to see if you have apps r...

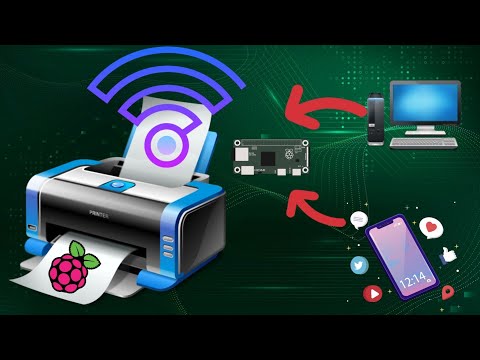
How to add Wireless capability to legacy printers using Raspberry Pi
This video tutorial demonstrates how to easily add wireless print capablity to your wired legacy printers using your Raspberry Pi. We hav...