I Needed manchester encoder and decoder code for my Embedded RF project but even after lots of googeling, To my suprise i dint find a proper manchester c code, So i decided to write my own Manchester Encoder and Decoder in C.This code might not be highly memory efficient but does the job
I have provided the download link below.
Hope it will be usefull to someone
Download This File
Saturday, October 1, 2011

Liberty-Loan > Earn Money for DOING NOTHING

THIS WEBSITE HAS TURNED TO SCAM SITES

*******************************************************************************
This is the Most most awesome earning site i have ever seen, After i Joined this site I instantly Got $1 in my Liberty-Loan account , then i logged out and after 4 days when i checked my account i had $1.04 ,So i tried to cashout out $0.04 to my liberty reserve account and i received $0.04 INSTANTLY, I was shocked i received 4 cents for doing absolutely nothing, so i would seriously recommend this site for everybody
You get 1% interest everyday, so if we check out account after a month we would have around 30 cents without investing a penny
Click Here to Join Now
Payment Proof Below

Wednesday, August 31, 2011
How to Read and Write to NTFS partition in Mac OS X
(Originally Posted in http://blog.tolik.org By Anatoliy S Okhotnikov )
This Tweak Adds the NTFS Write feature in MacOsX (Experimental):
This tweak is tested on MacOsX 10.6.7 - 10.7.0 (This May or Not Work on Lower Versions and some users have reported that similar tweaks have led to data loss or ntfs partition rendered unaccessible, So "PROCEED AT YOUR OWN RISK" )
Download This File
It has the ntfs.kext binary from the Mac OS X 10.6.8 Snow Leopard and a script. Unpack it to the Desktop. You should get the NTFS_Enabler folder with two files: mount_ntfs and ntfs. Launch Terminal.app and Proceed as Below ->
1) Type sudo -s and press Enter. Type in your password and press Enter.
2) Make backup copy of the ntfs.kext binary (!this is a one line command!):
3) Copy ntfs.kext binary from Mac OS X 10.6.8 Snow Leopard replacing the original one (!this is a one line command!):
4) Create a backup copy of mount_ntfs:
5) Now place the new mount_ntfs binary which activates ntfs.kext for rw:
6) Fix the scripts rights and attributes:
7) Launch Disk Utility and repair permissions. Reboot after this operation.
Package has a text document(Terminal-CMD) with the commands line by line, as the blog engine might break some lines. After the reboot the NTFS partitions must be mounted read-write without any additional fixes and reboots! In case anything goes wrong you can roll it back with the backed up copies.
This Tweak Adds the NTFS Write feature in MacOsX (Experimental):
This tweak is tested on MacOsX 10.6.7 - 10.7.0 (This May or Not Work on Lower Versions and some users have reported that similar tweaks have led to data loss or ntfs partition rendered unaccessible, So "PROCEED AT YOUR OWN RISK" )
Download This File
It has the ntfs.kext binary from the Mac OS X 10.6.8 Snow Leopard and a script. Unpack it to the Desktop. You should get the NTFS_Enabler folder with two files: mount_ntfs and ntfs. Launch Terminal.app and Proceed as Below ->
1) Type sudo -s and press Enter. Type in your password and press Enter.
2) Make backup copy of the ntfs.kext binary (!this is a one line command!):
mv /System/Library/Extensions/ntfs.kext/Contents/MacOS/ntfs /System/Library/Extensions/ntfs.kext/Contents/MacOS/ntfs_orig
3) Copy ntfs.kext binary from Mac OS X 10.6.8 Snow Leopard replacing the original one (!this is a one line command!):
cp ~/Desktop/NTFS_Enabler/ntfs /System/Library/Extensions/ntfs.kext/Contents/MacOS/ntfs
4) Create a backup copy of mount_ntfs:
mv /sbin/mount_ntfs /sbin/mount_ntfs_orig
5) Now place the new mount_ntfs binary which activates ntfs.kext for rw:
cp ~/Desktop/NTFS_Enabler/mount_ntfs /sbin/mount_ntfs
6) Fix the scripts rights and attributes:
chown root:wheel /sbin/mount_ntfs
and then: chmod 755 /sbin/mount_ntfs
7) Launch Disk Utility and repair permissions. Reboot after this operation.
Package has a text document(Terminal-CMD) with the commands line by line, as the blog engine might break some lines. After the reboot the NTFS partitions must be mounted read-write without any additional fixes and reboots! In case anything goes wrong you can roll it back with the backed up copies.
Monday, April 25, 2011
Adobe Acrobat Reader on 64bit Linux
/*\/*\/*\/*\/*\/*\/*\/*\/*\/*\/*\/*\/*\/*\/UPDATE*\/*\/*\/*\/*\/*\/*\/*\/*\/*\/*\/*\/*\/*\/
Adobe has released 64 bit version of Acrobat Reader for Linux
To install in ubuntu,open terminal and type
sudo apt-get install acroread
Or Visit
http://www.adobe.com/products/reader.html
Adobe has not released 64bit Acrobat reader for Linux and its not possible to install 32bit acrobat reader without doing some tweaks on 64bit Linux. so solution is to install i486 version of Acrobat reader.
Its Available for download at http://www.adobe.com/support/downloads/thankyou.jsp?ftpID=4454&fileID=4162
After you download the AdbeRdr9.4.2-1_i486linux_enu.bin file
open terminal and cd to the directory where you have saved the installation file
Now type sudo chmod a+x AdbeRdr9.4.2-1_i486linux_enu.bin
And Then type sudo ./AdbeRdr9.4.2-1_i486linux_enu.bin
This should install Acrobat reader on your 64bit Linux Os
For other Versions of Acrobat reader for Linux And Solaris
Visit
http://www.adobe.com/support/downloads/product.jsp?product=10&platform=unix
Adobe has released 64 bit version of Acrobat Reader for Linux
To install in ubuntu,open terminal and type
sudo apt-get install acroread
Or Visit
http://www.adobe.com/products/reader.html
/*\/*\/*\/*\/*\/*\/*\/*\/*\/*\/*\/*\/*\/*\/*\/*\/*\/*\/*\/*\/*\/*\/*\/*\/*\/*\/*\/*\/*\/*\/*\/*\/
Adobe has not released 64bit Acrobat reader for Linux and its not possible to install 32bit acrobat reader without doing some tweaks on 64bit Linux. so solution is to install i486 version of Acrobat reader.
Its Available for download at http://www.adobe.com/support/downloads/thankyou.jsp?ftpID=4454&fileID=4162
After you download the AdbeRdr9.4.2-1_i486linux_enu.bin file
open terminal and cd to the directory where you have saved the installation file
Now type sudo chmod a+x AdbeRdr9.4.2-1_i486linux_enu.bin
And Then type sudo ./AdbeRdr9.4.2-1_i486linux_enu.bin
This should install Acrobat reader on your 64bit Linux Os
For other Versions of Acrobat reader for Linux And Solaris
Visit
http://www.adobe.com/support/downloads/product.jsp?product=10&platform=unix
Saturday, April 23, 2011
Fix FlashPlayer Problem in Mozilla Firefox (Linux Os)
I used to face this problem in many websites which has video steaming, even thought youtube videos used to play properly in mozilla firefox (Linux OS) , while i play videos in Lockerz the videos were not playing properly , so after bit research i found this cool addon for firefox call Flash-Aid, after i installed this addon the flash player problem was fixed in Lockerz and other websites .
To install this addon in Firefox, click Tools -> Add-ons (Ctrl+Shift+A)
and search for flash-aid add-on else
visit
http://www.webgapps.org/downloads/addons-firefox?download=6%3Aflash-aid-add-on-for-firefox
and install the add-on manually
after successful installation you will find Flash-Aid icon on right most top corner of firefox
 Just click on that icon and new window will pop open
Select the Installation Options Tab
 And in the version and source , select the version of flash player suitable for your system, the flash-aid will automically select the best version for your system by default.
Then select the script preview tab and click on Execute Button

Now a Terminal(Konsole) windows will open and it will ask for root password
after you have entered the password, it will download the flashplayer and install and will ask you to restart Firefox
This should Fix Flash player problem in Mozilla Firefox.
To install this addon in Firefox, click Tools -> Add-ons (Ctrl+Shift+A)
and search for flash-aid add-on else
visit
http://www.webgapps.org/downloads/addons-firefox?download=6%3Aflash-aid-add-on-for-firefox
and install the add-on manually
after successful installation you will find Flash-Aid icon on right most top corner of firefox

Select the Installation Options Tab

Then select the script preview tab and click on Execute Button

Now a Terminal(Konsole) windows will open and it will ask for root password
after you have entered the password, it will download the flashplayer and install and will ask you to restart Firefox
This should Fix Flash player problem in Mozilla Firefox.
Monday, January 10, 2011
Finally Installed MacOsX On My Laptop
After Days of experimentation with many MacOsX distribution i finally found one which actually worked on my dell inspiron 1545 laptop.
But after installation : Sound , Wifi, Battery Monitor was not working and graphics was set to 1024x768
I tested many drivers and had many kernel panics but finally found some drivers that worked. still I'm unable to find graphics card driver and also laptop touchpad goes out of control sometimes.
I mainly got info from
http://wiki.osx86project.org
http://ihackintosh.blogspot.com
http://www.insanelymac.com/
If you are planning on installing OsX86 on your Pc or laptop you better findout the MacOsX version compatible for you Machine
You can find the Compatibility list from this link http://wiki.osx86project.org/wiki/index.php/Main_Page
Things i followed while Installing Mac And After installation:
1) Start installation in Safe mode and verbose mode. Just pass -x -v flags to kernel before you load the installation
2)During installation click customize and make sure you have ps2 kext clicked, In begining i had not clicked it and my laptop's keyboard was not working and i had to work with external usb keyboard but then i found the problem.
3)Right after finishing the installation , boot the installed OS with -x and -v flag and after you have setup user account and logged in then reboot and boot in normal mode, I found many times that after installation if i boot in normal mode it usually hangs.
4)Use kexthelper application for installing kext file(drivers)(kernel extention)
5)If you dont have working audio after installation search for VoodooHDA.kext for your laptop hardware online it worked for me.
6)And for broadcom wifi device i used IO80211Family.kext you might find one for your device if you do similar search
7)I used VoodooBattery.kext for laptop batter monitor .
8) I would recommend you first install windows and then install MacOsX as in mac boot loader even windows drive is shown and you can select windows partition to boot at OS selection menu of MacOsX
but if you install Mac first and then windows . Mac Mbr will be deleted and then you have to install extra software's like EasyBcd and configure to make MacOsX Appear in OS choice menu
9)Install Macdrive software (By MediaFour) in Windows , by using this you can easily access Mac Partition in Windows . So if you had installed a driver and it caused kernel panic ,you can boot to windows and browse Mac partition and go to System \ Library\ Extentions and find that kext file you recently installed and just delete it and now boot you MacOsX with -x -v flags (safe and verbose mode) and if it boots properly then reboot in normal mode.
10)After installing updates i usually faced kernel panic ,so right after update i used to boot with "-x -v arch=i386 -F" flags and it used to boot successfully. and try deleting dsmos.kext and sleepenabler.kext after installing the update in case you still get kernel panics as these two are usually main cause for kernel panics as far as i noticed.
This is all the tips I have for anyone who is interested in installing MacOsX on their PC or Laptops
If you Like Mac Buy it.
Thank You
But after installation : Sound , Wifi, Battery Monitor was not working and graphics was set to 1024x768
I tested many drivers and had many kernel panics but finally found some drivers that worked. still I'm unable to find graphics card driver and also laptop touchpad goes out of control sometimes.
I mainly got info from
http://wiki.osx86project.org
http://ihackintosh.blogspot.com
http://www.insanelymac.com/
If you are planning on installing OsX86 on your Pc or laptop you better findout the MacOsX version compatible for you Machine
You can find the Compatibility list from this link http://wiki.osx86project.org/wiki/index.php/Main_Page
Things i followed while Installing Mac And After installation:
1) Start installation in Safe mode and verbose mode. Just pass -x -v flags to kernel before you load the installation
2)During installation click customize and make sure you have ps2 kext clicked, In begining i had not clicked it and my laptop's keyboard was not working and i had to work with external usb keyboard but then i found the problem.
3)Right after finishing the installation , boot the installed OS with -x and -v flag and after you have setup user account and logged in then reboot and boot in normal mode, I found many times that after installation if i boot in normal mode it usually hangs.
4)Use kexthelper application for installing kext file(drivers)(kernel extention)
5)If you dont have working audio after installation search for VoodooHDA.kext for your laptop hardware online it worked for me.
6)And for broadcom wifi device i used IO80211Family.kext you might find one for your device if you do similar search
7)I used VoodooBattery.kext for laptop batter monitor .
8) I would recommend you first install windows and then install MacOsX as in mac boot loader even windows drive is shown and you can select windows partition to boot at OS selection menu of MacOsX
but if you install Mac first and then windows . Mac Mbr will be deleted and then you have to install extra software's like EasyBcd and configure to make MacOsX Appear in OS choice menu
9)Install Macdrive software (By MediaFour) in Windows , by using this you can easily access Mac Partition in Windows . So if you had installed a driver and it caused kernel panic ,you can boot to windows and browse Mac partition and go to System \ Library\ Extentions and find that kext file you recently installed and just delete it and now boot you MacOsX with -x -v flags (safe and verbose mode) and if it boots properly then reboot in normal mode.
10)After installing updates i usually faced kernel panic ,so right after update i used to boot with "-x -v arch=i386 -F" flags and it used to boot successfully. and try deleting dsmos.kext and sleepenabler.kext after installing the update in case you still get kernel panics as these two are usually main cause for kernel panics as far as i noticed.
This is all the tips I have for anyone who is interested in installing MacOsX on their PC or Laptops
If you Like Mac Buy it.
Thank You
Monday, June 7, 2010
Free Antivirus from Microsoft->Microsoft Security Essentials
These days a good antivirus software is highly recommended which can detect almost any virus or malicious contents But good antivirus means more cash $$$ to pay!!!
So Microsoft has come up with a solution for this problem...
After success with Microsoft's Live one care antivirus , Microsoft has finally decided to release a free Antivirus for Windows.
>This Antivirus is very Light(Not a Memory Hog)
>Very simple user interface(Not very complicated options or settings to bother)
>Very good in Virus detection (I have personally tested and Now i have started to use this antivirus and ditched my previous antivirus)
I have recommended this antivirus to all my family and friends and everyone are satisfied with its performance and so i recommend it to everyone who uses Windows OS
(Currently Supports Windows Xp, Windows Vista and Windows 7 )
You can download this antivirus for free from Microsoft Website
Download Here(http://www.microsoft.com/security_essentials/)
So Microsoft has come up with a solution for this problem...
After success with Microsoft's Live one care antivirus , Microsoft has finally decided to release a free Antivirus for Windows.
>This Antivirus is very Light(Not a Memory Hog)
>Very simple user interface(Not very complicated options or settings to bother)
>Very good in Virus detection (I have personally tested and Now i have started to use this antivirus and ditched my previous antivirus)
I have recommended this antivirus to all my family and friends and everyone are satisfied with its performance and so i recommend it to everyone who uses Windows OS
(Currently Supports Windows Xp, Windows Vista and Windows 7 )
You can download this antivirus for free from Microsoft Website
Download Here(http://www.microsoft.com/security_essentials/)
Subscribe to:
Posts (Atom)
-
Scanned and Confirmed to Be Virus Free Click Here to Download
-
This video tutorial demonstrates how to easily setup your Raspberry Pi as Android TV A big shout out to KonstaKang for providing a modified ...
-
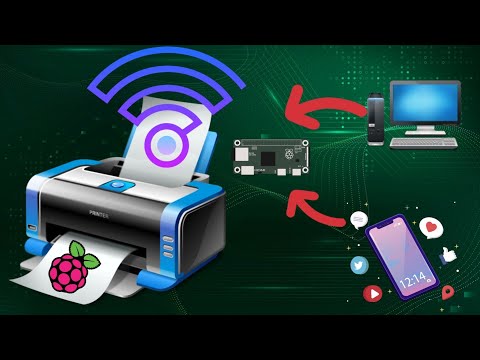
This video tutorial demonstrates how to easily add wireless print capablity to your wired legacy printers using your Raspberry Pi. We hav...


How to add Wireless capability to legacy printers using Raspberry Pi
This video tutorial demonstrates how to easily add wireless print capablity to your wired legacy printers using your Raspberry Pi. We hav...