Here’s a small tip which will help you to speed up Firefox3, follow the below instructions carefully:
1. Type “about:config” (without quotes) into the address bar and hit enter. You will get a warning message saying “changing these settings can be harmful to the stability, security and performance”. Just below the message click on the button “I’ll be careful, I promise”
2. Now, scroll down and look for the following entries:
network.http.pipelining
network.http.proxy.pipelining
network.http.pipelining.maxrequests
You need to alter the above entries as follows:
Set “network.http.pipelining” to “true”
Set “network.http.proxy.pipelining” to “true”
Set “network.http.pipelining.maxrequests” to some number like 30.
This means it will make 30 requests at once.
3. Once done right-click anywhere and select New> Integer.
Name it “nglayout.initialpaint.delay” and set its value to “0″.
This value is the amount of time the browser waits before it acts on information it receives.
Friday, September 12, 2008

How to Use Greasemonkey in Opera
Greasemonkey is a Firefox extension that allows Firefox users to install scripts that make quick changes to web pages. Using this extension you can add new functionality to web pages and web sites like adding an HTML signature in Google, bypassing image verification in Orkut, changing an orkut theme or a Gmail theme, etc.If you’re an Opera user then there’s a good news for you. Opera supports Greasemonkey scripts! These user scripts work exactly how they work in Firefox. You can simply import them into Opera unlike in Firefox you where you need to install the Greasemonkey addon. Here’s an easy tutorial which will guide you to do so:
1. Download the Greasemonkey script you want to use.2. Now, rename the script so that it ends with “.user.js”
3. Open Opera and go to Tools > Preferences > Advanced > Content and click the LavaScript Options button.
4. In User JavaScript files field, choose the location of your scripts folder and click OK.5. Restart Opera for the changes to take effect.
1. Download the Greasemonkey script you want to use.2. Now, rename the script so that it ends with “.user.js”
3. Open Opera and go to Tools > Preferences > Advanced > Content and click the LavaScript Options button.
4. In User JavaScript files field, choose the location of your scripts folder and click OK.5. Restart Opera for the changes to take effect.
Few Xp Secrets
Secret - Hidden Uninstall Options
Instructions - Warning: Proceed at your own risk! Browse to C:\Windows\inf\ and make a backup copy of sysoc.inf. Then open the original file C:\Windows\inf\sysoc.inf in notepad. Go to "Edit" and select "Replace". In "Find what:" type ,hide and in "Replace with:" type show, then select "Replace All", save and close the file. Go to the "Control Panel", "Add/Remove", select "Add/Remove Windows Components". You will now see many more Windows components to uninstall. Do not remove anything with no label or that you do not recognize or fully understand what it does. Doing so can break certain functionality in Windows.
Secret - Hidden Devices
Instructions - Go to the "Control Panel", "System" icon, "Hardware" tab and select "Device Manager". Select "View" and Show hidden devices.
Secret - Phantom Devices
Instructions - Go to "Start", "Programs", "Accessories" and select "Command Prompt". At the command prompt, type "set devmgr_show_nonpresent_devices=1" and press Enter. At the command prompt, type "start devmgmt.msc" and press Enter. Select "View" and Show hidden devices. You can see devices that are not connected to the computer. - Source
Notes - When you close the command prompt window, Windows clears the "devmgr_show_nonpresent_devices=1" variable that you set and prevents phantom devices from being displayed when you select "Show hidden devices".
Instructions - Warning: Proceed at your own risk! Browse to C:\Windows\inf\ and make a backup copy of sysoc.inf. Then open the original file C:\Windows\inf\sysoc.inf in notepad. Go to "Edit" and select "Replace". In "Find what:" type ,hide and in "Replace with:" type show, then select "Replace All", save and close the file. Go to the "Control Panel", "Add/Remove", select "Add/Remove Windows Components". You will now see many more Windows components to uninstall. Do not remove anything with no label or that you do not recognize or fully understand what it does. Doing so can break certain functionality in Windows.
Secret - Hidden Devices
Instructions - Go to the "Control Panel", "System" icon, "Hardware" tab and select "Device Manager". Select "View" and Show hidden devices.
Secret - Phantom Devices
Instructions - Go to "Start", "Programs", "Accessories" and select "Command Prompt". At the command prompt, type "set devmgr_show_nonpresent_devices=1" and press Enter. At the command prompt, type "start devmgmt.msc" and press Enter. Select "View" and Show hidden devices. You can see devices that are not connected to the computer. - Source
Notes - When you close the command prompt window, Windows clears the "devmgr_show_nonpresent_devices=1" variable that you set and prevents phantom devices from being displayed when you select "Show hidden devices".
How To: Edit the Windows Vista Boot Menu Options - BCDEDIT
Note: For an easy way to make changes to the BCD (Boot Configuration Data) please check out VistaBootPRO
Introduction
In Windows Vista, the Boot Configuration Data (BCD) store contains boot configuration parameters which control how the operating system is started in the Windows Vista and Windows Server Code Name "Longhorn" operating systems. These were found in the boot.ini file in previous versions of Microsoft Windows. To edit the Windows Vista Boot Menu Options, the Boot Configuration Data Editor - BCDEDIT is used.
The Bcdedit.exe command-line tool can be used to add, delete and edit entries in the BCD store which contains objects. Each object is identified by a GUID (Globally Unique Identifier). Every drive or partition on the system will have its own GUID and could be {legacy} (to describe a drive or partition on which a pre-Windows Vista operating system), {default} (to describe the drive or partition containing the current default operating system), or {current} (to describe the current drive or partition one is booted to), or for example {c34b751a-ff09-11d9-9e6e-0030482375e7} (to describe another drive or partition on which an operating system has been installed).
Bcdedit.exe is located in the \Windows\System32 directory of the Windows Vista partition and can be accessed only from the Command Prompt which is found on the Windows Vista start menu at Start>All Programs>Accessories
Command-line Help
bcdedit /? Shows all commands one is able to use
bcdedit.exe /? CREATESTORE Shows detailed information for the command CREATESTORE or any other command available in bcdedit as shown when running bcdedit /? followed by the particular command more information is required for.
bcdedit or bcdedit /enum all Shows the current structure of your boot configuration data.
The GUID tags {xxxxxxxx-xxxx-xxxx-xxxx-xxxxxxxxxxxx} of all Windows installations present on your computer will be displayed.
Create a Backup
It is strongly recommended that one creates a backup of the BCD store before making any changes to it.
bcdedit /export "D:\BCD Backup\Bcd Backup" Creates a backup to a pre-created folder, in this case "BCD Backup" on drive D:
bcdedit /import "D:\BCD Backup\Bcd Backup" Restores the backup previously created
Making Changes to the Boot Configuration Data
Before making any changes or attempting to use the commands below, run the command bcdedit or bcdedit /enum all to make sure that you use the correct GUID tag. These have been seen to change from build to build and it may be necessary to use {ntldr} instead of {legacy} for example.
bcdedit /set {legacy} Description "Windows XP Professional SP2" Changes the text description of the "Legacy" OS line in the boot menu. The quotation marks must be included in the command
bcdedit /set {current} description "Windows Vista Build 5270 x86" Changes the text of the boot menu line for the Vista or non-Vista installation one is currently booted to, from the default "Microsoft Windows" or other description to that shown in the quotation marks
bcdedit /set {5189b25c-5558-4bf2-bca4-289b11bd29e2} description "Windows Vista Build 5270 x64" Changes the text of the boot menu line for any other Vista installation. One must use the GUID for that particular installation as shown when one runs the bcdedit or bcdedit /enum all command
bcdedit /default {current} Sets the current Windows installation one is booted to as the default Windows boot OS
bcdedit /default {5189b25c-5558-4bf2-bca4-289b11bd29e2} Sets the referenced Windows OS as the {default} Windows boot OS
bcdedit /default {legacy} Sets the legacy (Windows XP) OS as {default} boot item
bcdedit /displayorder Sets the display order of boot menu items for example:
bcdedit.exe /displayorder {legacy} {current}
bcdedit /timeout 15 Changes the default 30 second time-out of the boot menu to 15 seconds or any other value inserted.
Correcting changes to the Partition/Disk structure
Where a partition or a hard drive has been added or removed and has caused the partition/disk structure to change, this can be corrected by running these commands in the order shown:
X:\>X:\boot\fixntfs.exe -lh -all (Where X: is the drive/partition on which the folder "boot" is to be found)
bcdedit /set {5189b25c-5558-4bf2-bca4-289b11bd29e2} device partition=X: Changes boot partition of the OS whose GUID is indicated. (Where X: is new drive/partition required). Must be used together with the osdevice command below
bcdedit /set {5189b25c-5558-4bf2-bca4-289b11bd29e2} osdevice partition=X: Changes boot partition of the OS whose GUID is indicated. (Where X: is new drive/partition required). Must be used together with the device command above
Msconfig - System Configuration Utility
The System Configuration Utility (msconfig) is accessible from the Windows Vista start menu, Start>All Programs>Accessories>System Tools>System Configuration. It has limited funcionality as regards the BCD store however, with the only relevant functionalities being to change the default boot operating system, to delete a boot menu item and to change the timeout display period of the boot menu.
CAUTION: Making incorrect or invalid changes to one's BCD store can result in the system no longer booting and only those comfortable with using command line entries and who understand the inherent risks of making a mistake should do so.
Advanced Options
Please do not run these commands unless you know what the outcome will be.
bcdedit /set {current} numproc 2
bcdedit /set {current} removememory 0
Source:http://www.pronetworks.org
Introduction
In Windows Vista, the Boot Configuration Data (BCD) store contains boot configuration parameters which control how the operating system is started in the Windows Vista and Windows Server Code Name "Longhorn" operating systems. These were found in the boot.ini file in previous versions of Microsoft Windows. To edit the Windows Vista Boot Menu Options, the Boot Configuration Data Editor - BCDEDIT is used.
The Bcdedit.exe command-line tool can be used to add, delete and edit entries in the BCD store which contains objects. Each object is identified by a GUID (Globally Unique Identifier). Every drive or partition on the system will have its own GUID and could be {legacy} (to describe a drive or partition on which a pre-Windows Vista operating system), {default} (to describe the drive or partition containing the current default operating system), or {current} (to describe the current drive or partition one is booted to), or for example {c34b751a-ff09-11d9-9e6e-0030482375e7} (to describe another drive or partition on which an operating system has been installed).
Bcdedit.exe is located in the \Windows\System32 directory of the Windows Vista partition and can be accessed only from the Command Prompt which is found on the Windows Vista start menu at Start>All Programs>Accessories
Command-line Help
bcdedit /? Shows all commands one is able to use
bcdedit.exe /? CREATESTORE Shows detailed information for the command CREATESTORE or any other command available in bcdedit as shown when running bcdedit /? followed by the particular command more information is required for.
bcdedit or bcdedit /enum all Shows the current structure of your boot configuration data.
The GUID tags {xxxxxxxx-xxxx-xxxx-xxxx-xxxxxxxxxxxx} of all Windows installations present on your computer will be displayed.
Create a Backup
It is strongly recommended that one creates a backup of the BCD store before making any changes to it.
bcdedit /export "D:\BCD Backup\Bcd Backup" Creates a backup to a pre-created folder, in this case "BCD Backup" on drive D:
bcdedit /import "D:\BCD Backup\Bcd Backup" Restores the backup previously created
Making Changes to the Boot Configuration Data
Before making any changes or attempting to use the commands below, run the command bcdedit or bcdedit /enum all to make sure that you use the correct GUID tag. These have been seen to change from build to build and it may be necessary to use {ntldr} instead of {legacy} for example.
bcdedit /set {legacy} Description "Windows XP Professional SP2" Changes the text description of the "Legacy" OS line in the boot menu. The quotation marks must be included in the command
bcdedit /set {current} description "Windows Vista Build 5270 x86" Changes the text of the boot menu line for the Vista or non-Vista installation one is currently booted to, from the default "Microsoft Windows" or other description to that shown in the quotation marks
bcdedit /set {5189b25c-5558-4bf2-bca4-289b11bd29e2} description "Windows Vista Build 5270 x64" Changes the text of the boot menu line for any other Vista installation. One must use the GUID for that particular installation as shown when one runs the bcdedit or bcdedit /enum all command
bcdedit /default {current} Sets the current Windows installation one is booted to as the default Windows boot OS
bcdedit /default {5189b25c-5558-4bf2-bca4-289b11bd29e2} Sets the referenced Windows OS as the {default} Windows boot OS
bcdedit /default {legacy} Sets the legacy (Windows XP) OS as {default} boot item
bcdedit /displayorder Sets the display order of boot menu items for example:
bcdedit.exe /displayorder {legacy} {current}
bcdedit /timeout 15 Changes the default 30 second time-out of the boot menu to 15 seconds or any other value inserted.
Correcting changes to the Partition/Disk structure
Where a partition or a hard drive has been added or removed and has caused the partition/disk structure to change, this can be corrected by running these commands in the order shown:
X:\>X:\boot\fixntfs.exe -lh -all (Where X: is the drive/partition on which the folder "boot" is to be found)
bcdedit /set {5189b25c-5558-4bf2-bca4-289b11bd29e2} device partition=X: Changes boot partition of the OS whose GUID is indicated. (Where X: is new drive/partition required). Must be used together with the osdevice command below
bcdedit /set {5189b25c-5558-4bf2-bca4-289b11bd29e2} osdevice partition=X: Changes boot partition of the OS whose GUID is indicated. (Where X: is new drive/partition required). Must be used together with the device command above
Msconfig - System Configuration Utility
The System Configuration Utility (msconfig) is accessible from the Windows Vista start menu, Start>All Programs>Accessories>System Tools>System Configuration. It has limited funcionality as regards the BCD store however, with the only relevant functionalities being to change the default boot operating system, to delete a boot menu item and to change the timeout display period of the boot menu.
CAUTION: Making incorrect or invalid changes to one's BCD store can result in the system no longer booting and only those comfortable with using command line entries and who understand the inherent risks of making a mistake should do so.
Advanced Options
Please do not run these commands unless you know what the outcome will be.
bcdedit /set {current} numproc 2
bcdedit /set {current} removememory 0
Source:http://www.pronetworks.org
Thursday, September 11, 2008
Start applications on specific CPU and priority
There is a great little utility that has been around for ages in Windows called the start command. This dos command allows you to start any process with advanced settings. In Windows Vista it is perfect if you want to start an application and tell windows to only run it on one CPU and at a high priority level. For example, let's say that you want to start Microsoft Paint and have it run on your second CPU core at Above Normal priority. The command below will accomplish this:
start /affinity 2 /abovenormal mspaint.exe
You can customize the command above and replace the 2 with the processor number (in hex) that you want the processor to run on. You can also adjust the priority level by using one of the flags below:
- /Low
- /Normal
- /High
- /Realtime
- /Abovenormal
- /Belownormal
Disable Welcome Center
Windows Vista is provided with Welcome Center that is designed to help beginner Windows users easily configure their new computer. This new welcome screen is a nice feature the first time you start using Windows vista but quickly becomes annoying.
Disabling the Welcome Center can speed up your boot .
1. Start Regedit (press winkey+r or click on run found on start menu).
2. Navigate through HKEY_CURRENT_USER, Software, Microsoft, Windows, CurrentVersion, Run.
3. Right click on the WindowsWelcomeCenter key and select Delete.
The next time you restart the Welcome Center will be gone.
Tuesday, September 9, 2008
MVAV The Most Genuine Site Ever(No Minimum PayPal Payout)
This Is As Far The Most Genuine Site I Have Ever Come Across,i Reach Minimum Payout Everyday
You Get Paid For Every Valid Impressions You get from US & UK..
No Minimum Payout Through Paypal
To Join CLICK HERE
Subscribe to:
Posts (Atom)
-
Scanned and Confirmed to Be Virus Free Click Here to Download
-
This video tutorial demonstrates how to easily setup your Raspberry Pi as Android TV A big shout out to KonstaKang for providing a modified ...
-
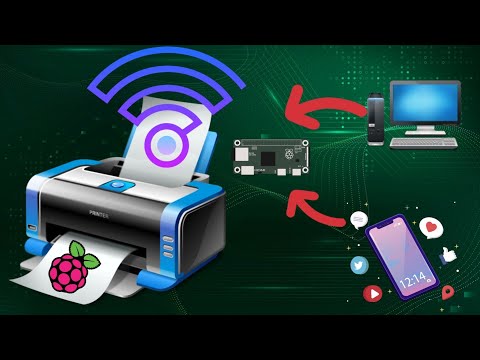
This video tutorial demonstrates how to easily add wireless print capablity to your wired legacy printers using your Raspberry Pi. We hav...


How to add Wireless capability to legacy printers using Raspberry Pi
This video tutorial demonstrates how to easily add wireless print capablity to your wired legacy printers using your Raspberry Pi. We hav...